
I got my Con cherry popped not too long ago by Emerald City. It wasn't planned - I hadn't thought about going at all. One day, however, two of my best buds mentioned that they was taking their comic on the road to Seattle.
"Boy," said Mr. C, "it would be cool to go down and hang out with them."
"Yeah," I said, "and, like, cosplay and stuff."
We laughed. And then looked at each other with intensity. It dawned on us. This was our chance to finally see what all the fuss was about. I'm pretty sure I didn't sleep well for months after that - All I could do was think about finally going to my first convention. What would it be like? Would it really smell like BO and regret? Would I get to talk to someone famous? Would I spend all my money on Booster Gold figurines? Would my very first cosplay end up in pieces on the vendor floor? SO MANY QUESTIONS.
Emerald City came and went. It was like a blur. At the end of it, I was tired and sick and achy. But, boy, could I not wait to do it again.
I bet you San Diego is a thousand times this.
Comic Con is everywhere right now. Facebook, Twitter, Tumblr. Even freakin' Pinterest. Even though our best buds are going (and hopefully will pick me up some sweet art and/or a naked Brock Samson action figure), Mr. C and I will not make the pilgrimage this year. I'm not going to lie, I'm pretty bummed about it. I mean, I'm not really into going to panels. Or getting swag bags. Or getting my photo taken with famous people. I really want to go to Comic Con to experience that feeling of being home with my fellow nerd brethren. I don't have to pretend to be a professional so-and-so there. I don't have to wear my mask of social acceptance. I can just be myself and totally nerd out. That, to me, is the coolest thing about Comic Con.

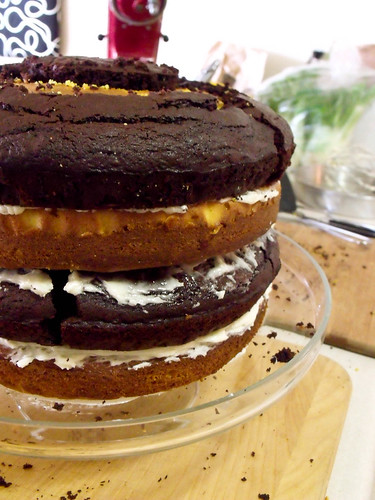
If you are one of the lucky nerdlingers at Comic Con today, I want to leave you with something that really hit me in the old ticker from super geek, Tony B Kim. In his blog, Crazy 4 Comic Con, he goes over the ins and outs of how to survive Nerdvana. It was his video on Monday that really hit home, though. He reminds us - inside and outside of Comic Con - to be kind to your fellow nerd. Go out of your way to do something nice. Make someone's day. Go out and offer to buy coffee for someone who looks like they're having a rough day. Ask that little kid in the Batman cosplay if you can take a picture with him, because he's so totally awesome. Smile. Brighten up the nerd community. We can't be there to spread the joy in San Diego, so we made a goddamn huge cake to celebrate with everyone.
So, Comic Con friends - enjoy! And tweet lots and lots of pictures. We're jealous already.
And, seriously, someone needs to grab me that naked Brock action figure. For reals.
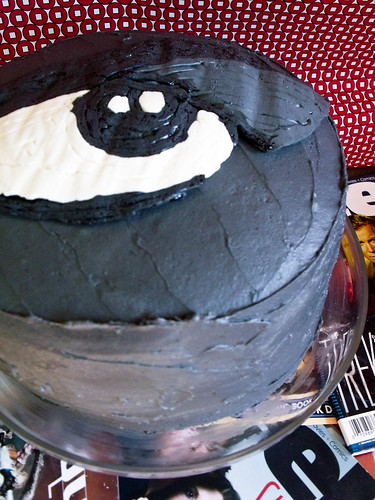
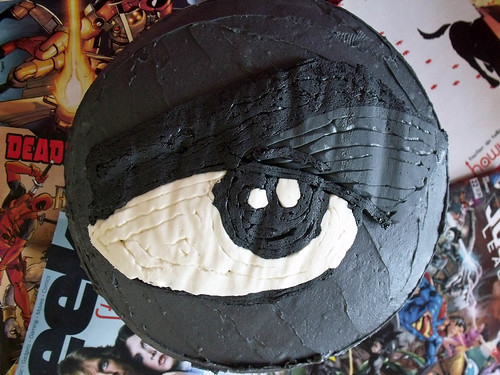
San Diego Comic Con Cake
A note: This cake is huge. Like, ginormous. Have several friends handy to consume extra cake.
Espresso Chocolate Cake
3 ounces bittersweet chocolate
1 cup espresso or really strong coffee
2 large eggs
2/3 cup vegetable oil
1 cup buttermilk
1 teaspoon vanilla
2 cups sugar
2 cups flour
1 cup cocoa powder
2 teaspoons baking powder
1 teaspoon salt
1) Preheat your oven to 350F. Chop up your bittersweet chocolate and melt it into your hot espresso. Make sure to stir so that there are no large bits of chocolate left. Set aside to cool. In a medium bowl, whisk together the sugar, flour, cocoa, baking powder, and salt. Set aside.
2) In a large bowl with a mixer, whip up the eggs for about 3 minutes - until they're fluffy, pale in colour, and almost doubled in volume. One at a time, add the oil, buttermilk, and vanilla. Mix while adding to make sure everything is incorporated. Add the chocolate/coffee mixture and beat until everything is evenly mixed.
3) With a wooden spoon, stir in your dry ingredients until just combined - do not overmix! Pour your batter equally into two greased 9" cake tins. Bake for 25 to 30 minutes, or until your cake tester comes out clean. Set out to cool before cutting and icing.
Yellow Cake
adapted from cakespy's recipe from The Secret Lives of Baked Goods
1 cup butter
1 1/2 cup sugar
1/4 cup brown sugar
4 eggs, separated
2 teaspoons vanilla extract
1 cup sour cream
1/4 cup milk
1 cup cake flour
1 1/2 cup AP flour
2 teaspoons baking powder
1/2 teaspoon salt
yellow food colouring (if you'd like a nicer Comic Con Yellow colour)
1) Separate your eggs. Take your egg whites and whip until nice you've hit soft peaks. Set aside. In your mixer, take your butter and whip up with your two sugars. Add your egg yolks, one at a time, and continue to whip until everything is incorporated. Stir in the vanilla and your food colouring (if you are using it).
2) Preheat your oven to 350 degrees. Sift in both of your flours, baking powder, and salt. Give it a couple stirs, then add your sour cream. Mix with a wooden spoon a couple of times. Add your milk, and then stir until everything is incorporated. Take those whipped egg whites you've set aside and gently fold into the batter using a spatula.
3) Pour your batter equally into two greased 9" cake pans. Bake for 30 to 35 minutes, or until your cake tester comes out clean. Set out to cool before cutting and icing.
Swiss Meringue Buttercream
2 cups sugar
8 large egg whites
3 cups butter, softened and cubed
2 teaspoon vanilla
1) Place egg whites and sugar in a double boiler. With the water simmering, whisk the whites until the sugar grains have all disintegrated.
2) Remove from heat and pour into a large bowl, careful not to drip any water into the eggs. With an electric mixer, beat the eggs until they form stiff, glossy peaks. Reduce the mixer speed, and slowly add the butter, one small cubed at a time. Mix until it seems like your mixture has begun to curdle (don't worry, it hasn't!) and then keep mixing until smooth. This will take quite a while, but don't give up!
Putting together your cake
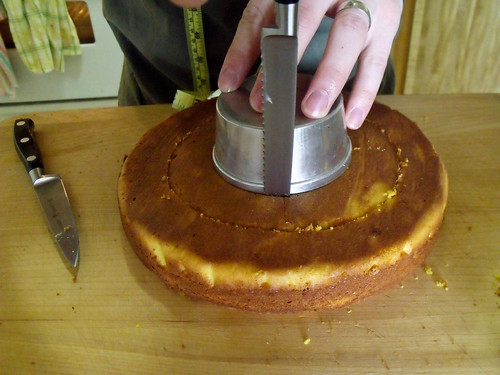
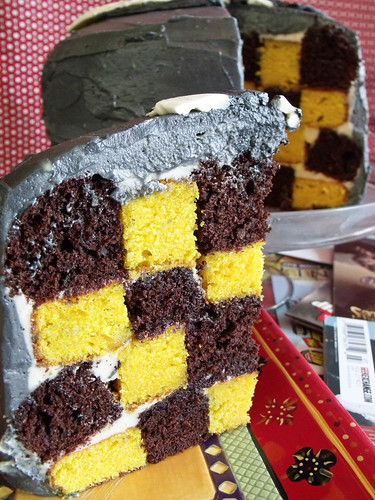
1) Take your four cooled 9" cakes and put them on your cutting board. First off, level your cakes, making sure that they're both the same height. Take a 6" and a 3" cake pan (or draw yourself 6" and a 3" circles and cut them out). Start with your 6" and place it right smack dab in the middle of your cakes and cut around it. Next, do the same thing with your 3" circle. Very carefully disable your cakes - so you should have four 9" rings, four 6" rings, and a small 3" circle.
2) Now it's assembly time! Start with a yellow cake 9" ring, slide a chocolate 6" ring inside, then finish it off with a yellow 3" circle in the middle, making what looks like a sweet cake bullseye of goodness. Cover with a thin layer of buttercream, then carefully start your next layer. You started with the yellow cake 9" first, so now your next layer will start with a chocolate 9" ring. Carefully stack it on top, then slide in a yellow 6" ring, and then a chocolate 3" circle. Continue your stacking until you've got all four layer stacked beautifully with a small layer of buttercream in between.
3) Cover the rest of your cake in buttercream - we tinted ours grey first. If you'd like a neato San Diego eye like the one we've got, you can use a buttercream transfer technique. Enjoy cake with, like, twenty friends, and dream about going to Nerdvana next year.

No comments:
Post a Comment